
Introduction
Face painting is a fun and creative way to transform yourself into various characters and creatures. One of the most popular face paint designs is the butterfly. With its vibrant colors and delicate wings, a butterfly face paint can make anyone feel magical and whimsical. In this article, we will provide you with easy step-by-step instructions on how to create a stunning butterfly face paint design.
Gather Your Supplies

Before getting started, it is essential to gather all the necessary supplies. Here's what you'll need:
- Face paints in various colors
- Paintbrushes of different sizes
- A sponge
- Water and a container for cleaning brushes
- Glitter (optional)
- Face painting stencils (optional)
Preparing the Face

Before starting to paint, ensure that the face is clean and free from any oils or lotions. This will help the face paint adhere better and last longer. You can gently cleanse the face with a mild cleanser and pat it dry. It's also a good idea to tie back any hair that may obstruct the painting process.
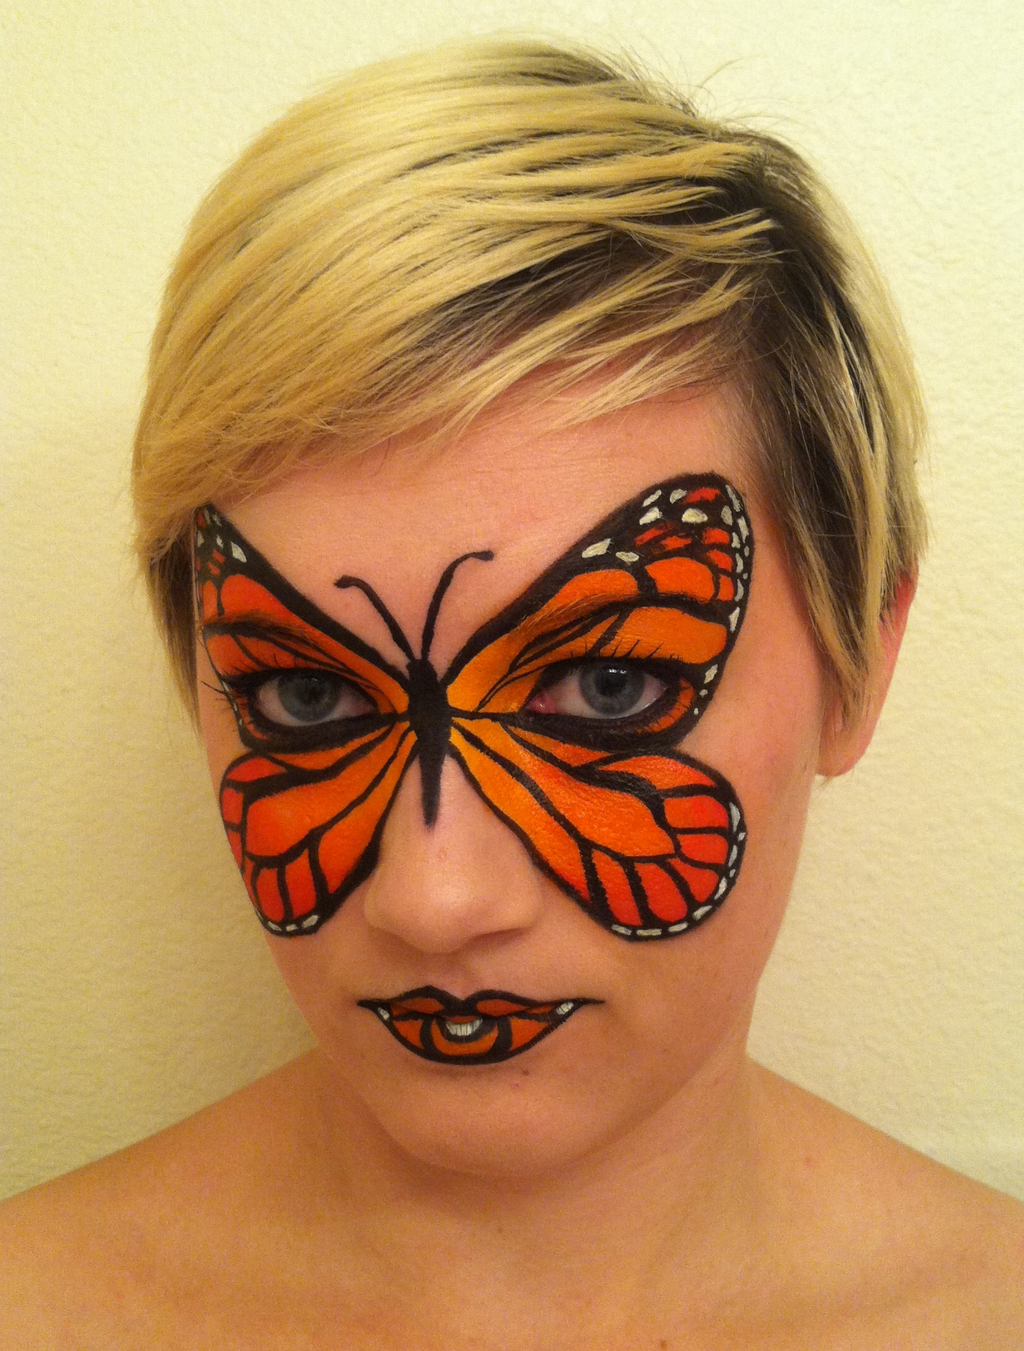
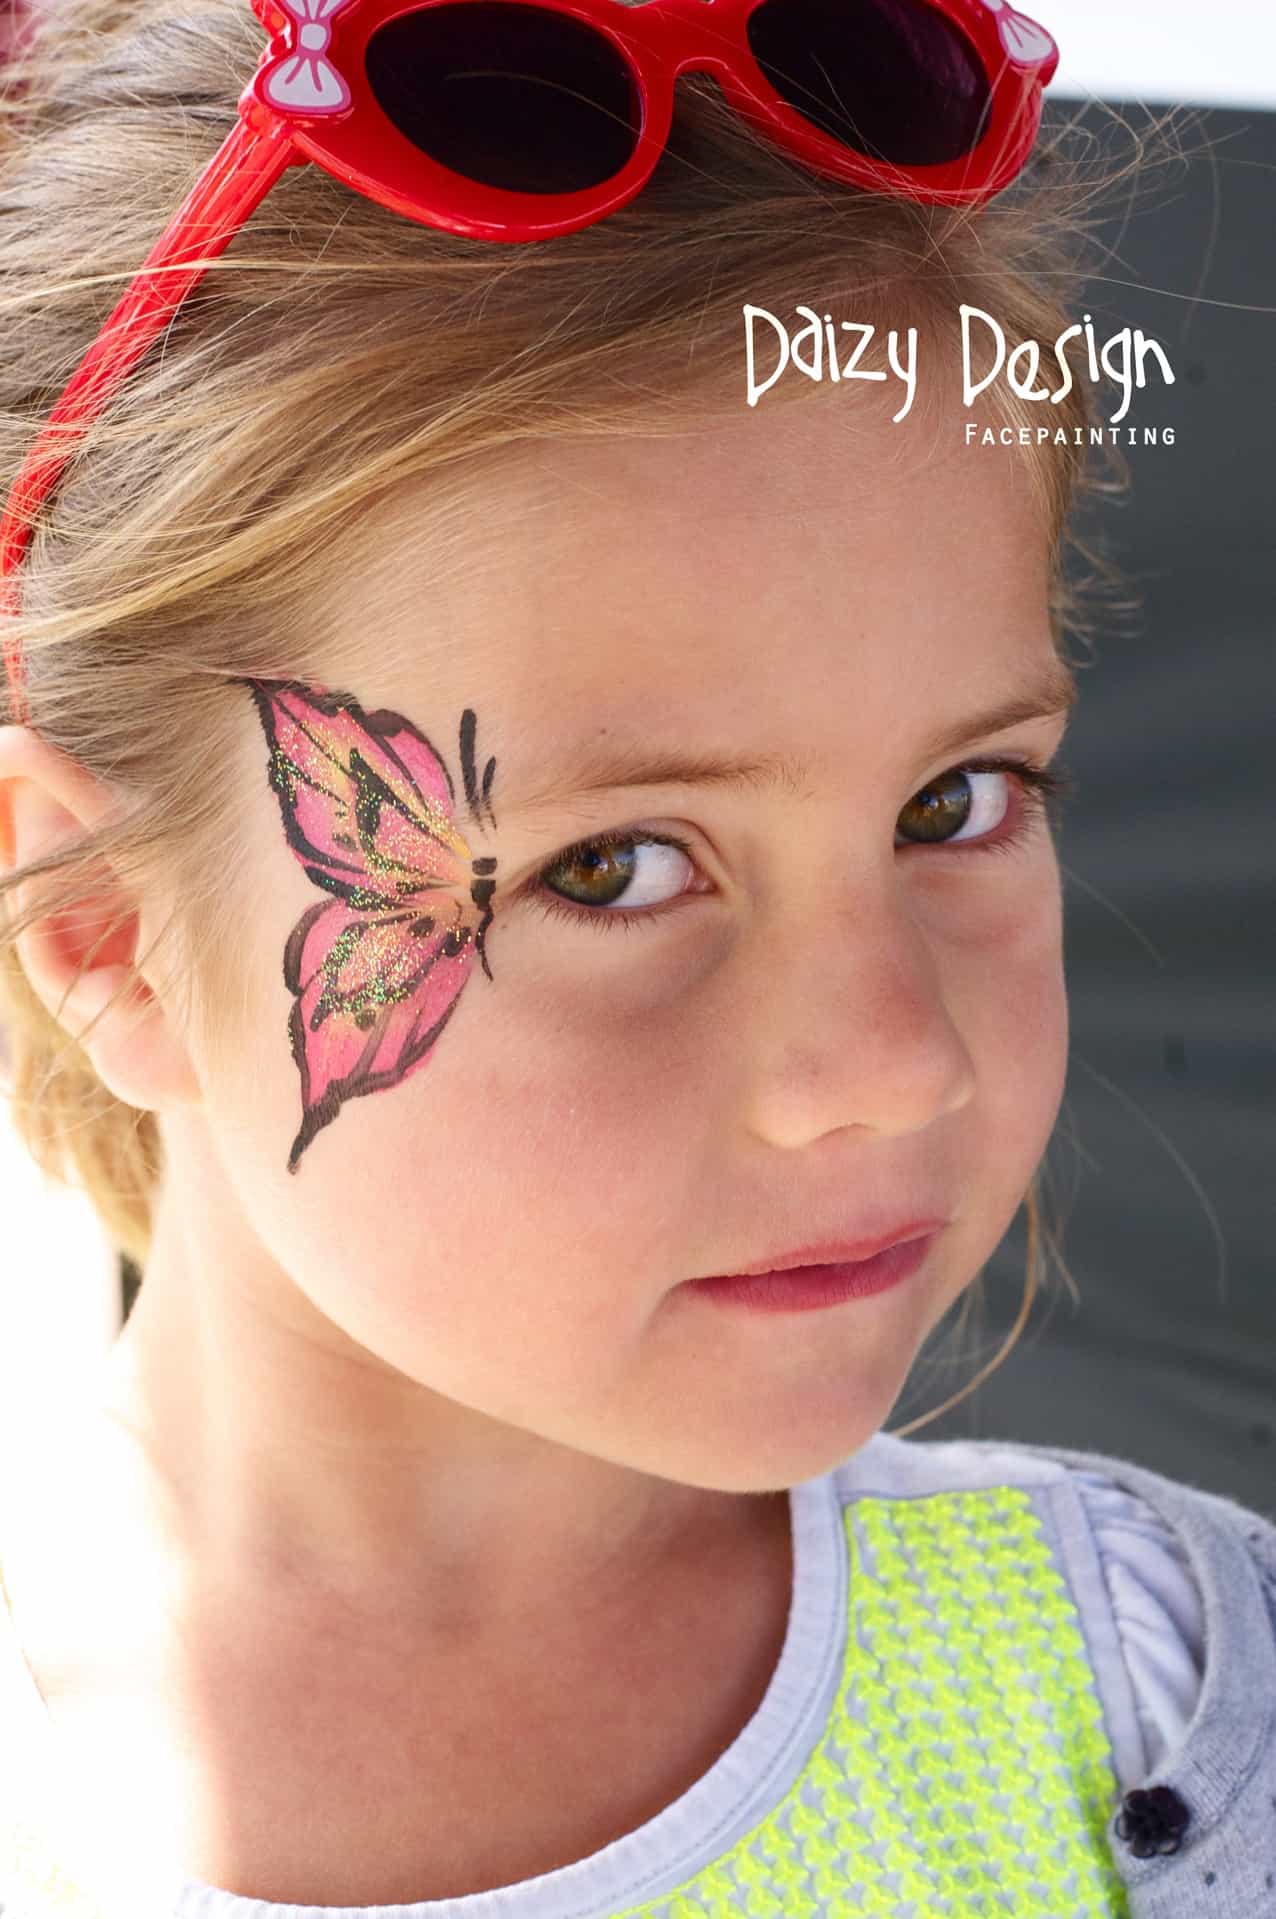
Outline the Butterfly Shape

Using a fine-tipped brush and a color of your choice, start by outlining the butterfly shape on the forehead. The outline should resemble two elongated teardrop shapes with the narrow ends meeting at the center of the forehead. This will serve as the base for your butterfly design.
Fill in the Wings

Once the outline is complete, use a larger brush or a sponge to fill in the butterfly wings with your desired colors. You can choose to have a gradient effect by blending two or more colors together. Start from the center of the wings and work your way towards the edges, ensuring even coverage.
Add Details

After filling in the wings, it's time to add some intricate details to make your butterfly design stand out. Use a thin brush to draw delicate lines and patterns on the wings, resembling the veins of a butterfly's wings. You can also add dots, swirls, or other decorative elements to enhance the overall look.
Highlight with Glitter

To add a touch of sparkle and magic to your butterfly face paint, consider using glitter. Apply a thin layer of cosmetic glitter on top of the painted wings using a clean brush or your fingertips. The glitter will catch the light and make your butterfly design shimmer.
Complete the Look
To complete the butterfly face paint look, you can extend the design beyond the forehead. Paint smaller butterflies or flowers on the cheeks or add some additional details around the eyes. Be creative and let your imagination soar!
Seal the Design

Once you are satisfied with your butterfly face paint, it's important to seal the design to make it last longer. Use a setting spray or a light mist of hairspray to prevent smudging and ensure that your creation stays intact throughout the day.
Removal and Clean-up
When it's time to remove the butterfly face paint, simply use a gentle cleanser or baby wipes to wipe away the design. Make sure to moisturize the skin afterward to keep it hydrated. Clean your brushes thoroughly with water and mild soap to maintain their quality for future face painting adventures.
Conclusion
Creating a butterfly face paint design is a fantastic way to express your creativity and transform into a magical creature. With the right supplies and simple steps outlined in this article, you can easily achieve a stunning butterfly face paint look. So, gather your materials, let your imagination take flight, and enjoy the process of bringing your butterfly design to life!
